
Network Attached Storage: A guide for photographers
If you have been shooting for a number of years, you’ll notice that you have an unending exponential amount of images eating up untold gigabytes of hard drive space. But what to do about it?
You can try to save hard drive space by deleting your ‘zero star’ images, or even deleting your RAW images once the job is over (God forbid!). Or just keep buying more hard drives – but then you need another system to track which hard drive your images are stored on.
One of the best ways to combat this dilemma is to bite the bullet and invest in a decent Network Attached Storage (NAS) archival system. Thomas Ryan reveals the ins and outs of NAS for Capture.
Like most of us when I started out, I’d take photos and put them on a hard drive. Then another. Then another. This served me well for many years but after a while, it can lead to chaos when trying to locate, work on or backup your files. People have invented spreadsheet systems to keep track of all this – but who really wants to do that?
These days, there are a number of very affordable NAS systems on the market which can be filled with relatively inexpensive high capacity hard drives. If the price bothers you, you must ask yourself – what is the price for peace of mind and the ability to find any of your work within seconds VS searching through draws full of random hard drives.
Many stories I read when looking for a NAS weren’t written for photographers’ or videographers’ workflows. The stories that did focus on photography often discussed a NAS purely as a backup device and not for working off. In this article I want to discuss my experiences with using a NAS as an archive and to work directly off.
What is a NAS?
I like to think of a NAS as a centralised hard drive where all my data lives. Instead of having to keep track of where files are on different physical drives, a NAS combines multiple hard drives into a RAID array (more on this later) so that these drives appear effectively as one large storage pool. Unlike direct access storage (DAS), such as an external or internal hard drive, multiple users have instantaneous access to all the data stored on a NAS via the network. This is great for working on the field on a laptop, and then accessing the data on a more powerful computer back in the office. Or you could even have the NAS set up at a remote secure location – away from your office.
I find using the software that comes with my NAS to automate tasks such as backing up my data critical for my workflow and the safety of my data. This is something a DAS setup can’t do out of the box, as it requires additional third party software.
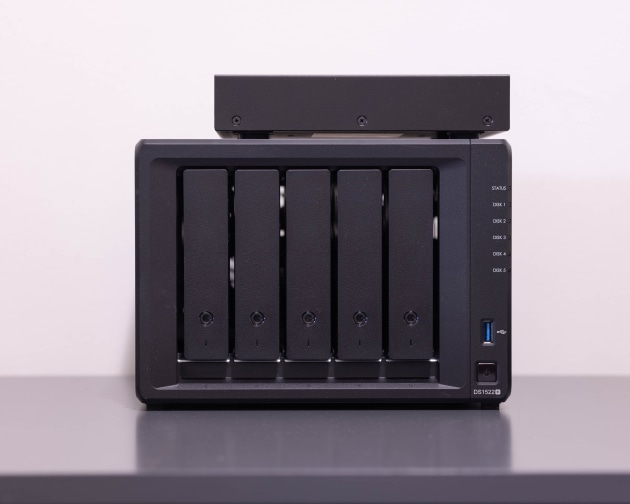
The major brands in NAS systems are Synology, QNAP, Ausustor and TerraMaster, all offering a plethora of hardware options. It’s worth taking the time to research the apps and operating system environments of each brand. Watching online videos of what each brand offered helped me to make a decision in buying my first NAS. Ultimately, I chose Synology as I found their apps and overall user experience intuitive. I originally bought a Synology DS220+ unit but outgrew its size and data transfer speed bottlenecks. I am now using a five-bay Synology DS1522+ which has large expandable memory and fast ethernet connection to work directly off the NAS.
A larger NAS is a good long term investment
NAS hard drives, which can be hard disc drives (HDD) or solid state drives (SSD), come in many different capacities that are installed directly into the NAS unit. ‘NAS specific’ drives differ from ‘traditional’ drives as they’re built to be operational 24/7, and withstand heat and vibrations.
Whilst four bay and larger units are more expensive than their two bay siblings, in the long term they provide a much better upgrade path in terms of additional storage and the read/write speeds gained from additional hard drives.
My Synology DS1522+ has five hard drive bays. I currently have three of these five bays loaded with 12 terabyte drives providing me with 24 terabytes of usable storage. Over time, I can add more drives to the NAS and increase my storage. As a NAS is scalable, you can save money by not having to fill every single hard drive space at once.
Configuring a NAS for storage and redundancy
Whilst there are a multitude of RAID options (do a search for “raid configurations to see what suits your needs) I will be discussing my setup using RAID 5. This provides many positives for my storage and editing workflow. This setup means should any one of my drives fail, my data will still be safe as data is written across all of the drives to create what is known as redundancy. This accounts for the usable space being less than the total drive space.
Other RAID setups of note are: RAID 0 – which have the fastest speeds, but if one drive dies, you lose all your data (well… probably). RAID 1 – which is the slowest speeds, but also the safest as each HD has a mirrored back up drive.
Remember that RAID isn't a backup and you must still backup your NAS so, in the event of catastrophic failure, you can recover from this loss. More on how to backup your unit later.
Why opt for a 10GbE connection?
A 1GbE (125 megabytes a second) network connection on NAS systems has been the predominant configuration out of the box for decades. My Synology DS1522+ has x4 1GbE connections that come preinstalled.
My first NAS, the Synology DS 220+ was limited to x2 1GbE connections with no option to upgrade. Whilst backing up to this unit worked like charm, it became apparent that with my ever-growing data (due to increased file size, greater megapixels and video resolution) the limiting factor in working directly off the NAS was the 1GbE connection.
By utilising the latest 10GbE connection, the benefits of working directly from a NAS become a reality and my workflow became much faster when accessing my files for photo and video editing. According to Synology, the DS1522+ has the ability for 736/796 MB/s sequential read/write speeds. Speed and storage benefits are gained without the high costs associated with the option of a fast SSD setup. Whilst SSD prices continue to come down (at the time of writing a Samsung QVO 8TB SSD is around $700) a 10TB Seagate NAS drive is $300. Buying five of these drives to fill my DS1522+ totals $1500. The SSD equivalent would cost $3500!
Thankfully, prices for a 10GbE connection interface have also come down dramatically in recent years. A 10GbE (1,250 megabytes a second - ten times faster than traditional 1GbE) network has become a realistic and cost effective proposition.
Models with 10GbE connections
NAS brands offer different ethernet speeds which come with the unit or can be upgraded by installing an optional network card.
Hardware required for a seamless 10GbE connection
In order to have a fast connection you’ll not only need your NAS to be 10GbE ready, but everything in between the NAS and your computer to be 10GbE capable as well.

NAS 10GbE network card
Make sure to check that the NAS you are looking at has the option to upgrade to 10GbE. It’s the first chain in the link in order to be able to work with this throughput. For my Synology DS1522+ I required a proprietary E10G22-T1-Mini Network Upgrade Module ($250). I accessed the expansion bay on the back of the NAS, removed the two screws and inserted the card.
The options for a 10GbE connection will vary depending on the NAS you choose. Here are some examples that provide a 10GbE interface:
Synology DS1522+ - 5 Bays, x4 1GbE, optional 10GbE network card required
QNAP TS-473A - 4 Bays, x2 2.5GbE, optional 10GbE network card required
Asustor AS6704T - 4 Bays, x2 2.5GbE, optional 10GbE network card required
TerraMaster F5-422 - 5 Bays, x2 1GbE, x1 10GbE built in.
Network Switch
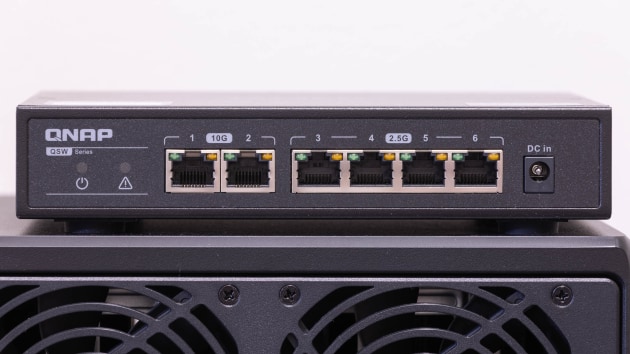
I like to think of a network switch as an electrical power board, providing you with more ports than your router to be able to connect things such as your TV and other devices. More importantly you will require a network switch capable of providing 10GbE throughput.
Work out how many connections you will require too so you have enough ports to connect devices such as your computer, laptop and other peripherals such as your router. I use a QNAP 2104-2T 4 Port switch ($250) providing 2x 10GbE Ports and 4x 2.5GbE ports providing a relatively cheap entry point into a 10GbE setup.
Network adaptors/PCIe expansion cards
Depending if you're using a Mac or PC the connection options to your computer will vary.
Mac: Some of the latest Macs such as the Mac Pro and Mac Studio come standard with 10GbE connection. Others such as the Mac Mini have this as an option at purchase. If your Mac lacks a dedicated 10GbE connection you will need to get a dongle such as the OWC Thunderbolt 3 to 10G Ethernet Adapter ($350).
PC: Native 10GbE support on a PC motherboard is still quite rare. You will need a 10GbE PCIe network card to install into one of your motherboard PCIe expansion slots. I use a TP-Link TX40110GbE Network Card ($130)
Ethernet cable: You will require a CAT6 or CAT6a cable to be compatible with a 10GbE connection. These are relatively cheap (a 20m cable costs around $20) and come in various lengths.
How to backup your NAS
As mentioned, a NAS isn’t a backup. Hard drive failure within the NAS isn’t the only thing that can go wrong. Fire, theft, electrical strikes and even accidental deletion are all ways to lose your precious data. Whilst a RAID setup provides automated redundancy of your data (i.e. the data is written across all drives), you must also have a suitable backup of the NAS. I follow the 3-2-1 principle of backup. Three copies of my data on two separate forms of media (NAS and external hard drive) and one copy stored off site. For safeties sake, you can also save your favourite personal and professional site through a cloud service.
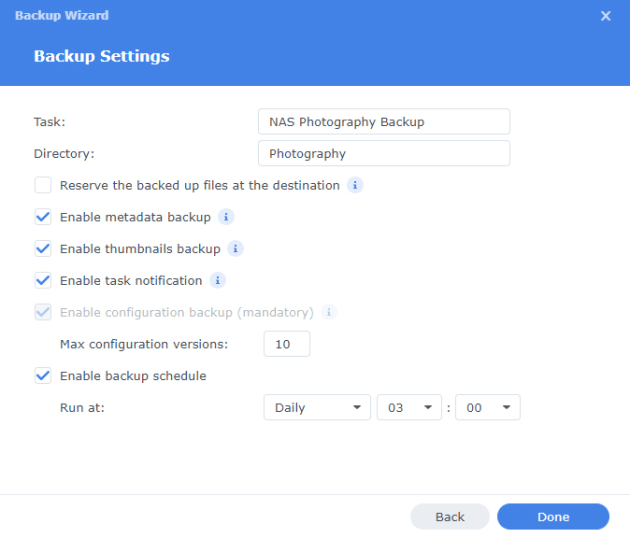
The software and apps available through my Synology NAS provides a rich variety of options for backup tasks to be performed, which once set up, are fully automated. Other brands of NAS will have similar software to perform backup tasks.
I use Hyper Backup on the Synology 1522+ to backup the NAS to an external hard drive. The external hard drives don’t have to be the fastest drives, as these are purely for backups. The granular options with Hyper Backup are powerful and numerous. For example with Hyper Backup I can create a backup that provides me with the ability to go back to a previous version of my work I might have accidentally deleted or had a malware/virus attack. I can choose how many versions (retention) I retain, and the benefit of this backup is it’s incremental so it's not making an entire copy of my data every time, only any changes that have occurred since the last backup.
With Hyper Backup I use two external hard drives plugged directly into my DS1522+ to create two copies of all my data. I rotate these drives so one is always stored off site. The options available for backing up to and from my NAS with Synology software are numerous, and aren’t limited to physical hard drive backups. Cloud backups are also possible. Different NAS systems have different options, so if cloud backup is important you should consider this when choosing a system.
Lightroom and NAS workflow
It is important to know that you cannot put your Lightroom (LR) catalogue on the NAS. Whilst your photographs can be moved onto the NAS, your catalog must be stored on your local hard drive or an external hard drive connected to your computer. For the fastest workflow, have your LR catalog on a fast local SSD drive.
Move your photographs that are on your local computer/external hard drives over to the NAS.
I prefer to do this manually by moving the folders outside of Lightroom. Once your photographs have been moved to the NAS you need to update and relink the folder location so it points to the NAS. In LR go to your current photography folder, right click this folder and select “update folder location’’. You want to point it to the NAS folder where your photographs are now stored.
I hope my experiences have provided you with some insights into setting up a robust backup solution and working directly from a NAS using a fast 10GbE connection. While the work involved in setting up a NAS can seem daunting and the initial setup cost can be relatively expensive, a NAS should be seen as a long term investment providing massive amounts of centralised storage, fast write/read speeds and data protection.
**Synology has provided me with a DS1522+ NAS and the 10GbE expansion network card for the purposes of this feature story. I am not affiliated with Synology and my views are my own.